Thumbify allows users to create and send digital documents easily and conveniently. This article will show you how to create a document in Thumbify.
This is how it’s done
Step 1: Download and install the app
Download the Thumbify app from the App Store (iOS) or Google Play Store (Android) and install it on your smartphone or tablet.
Step 2: Open and register Thumbify
Open Thumbify on your mobile device. If you’re using the app for the first time, you’ll need to register for free first. Follow the on-screen instructions to create an account. If you already have an account, sign in with your credentials.
Step 3: Create a new document
After you sign in to the app, you’ll find a green plus button on the bottom right of the screen on the “Documents” tab. Tap on the plus button to create a new document.
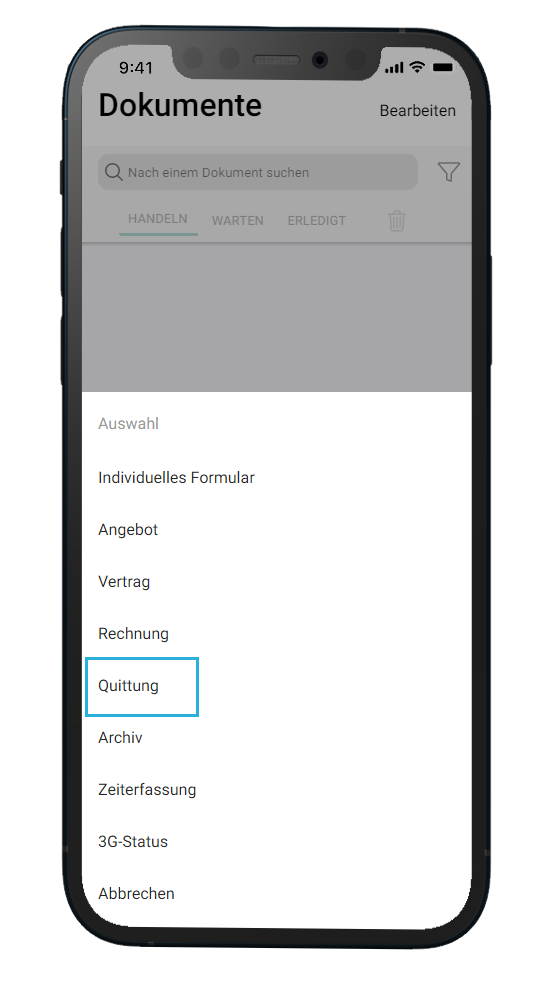
Step 4: Select a document type
Thumbify offers several document templates here. Choose the appropriate document type for your project. For example, you can select “Receipt”, “Contract”, “Invoice” or “Offer”. Tap on the favorite document type to continue. A form will open.
Step 5: Enter document data
Fill in the required information in the provided fields. Depending on the document type, this could be, for example, the description of a product, the service or invoice date, or other relevant information. Be careful and check the entries to make sure that all the information is correct. Once you are done, you can tap on the right arrow in the upper right corner.
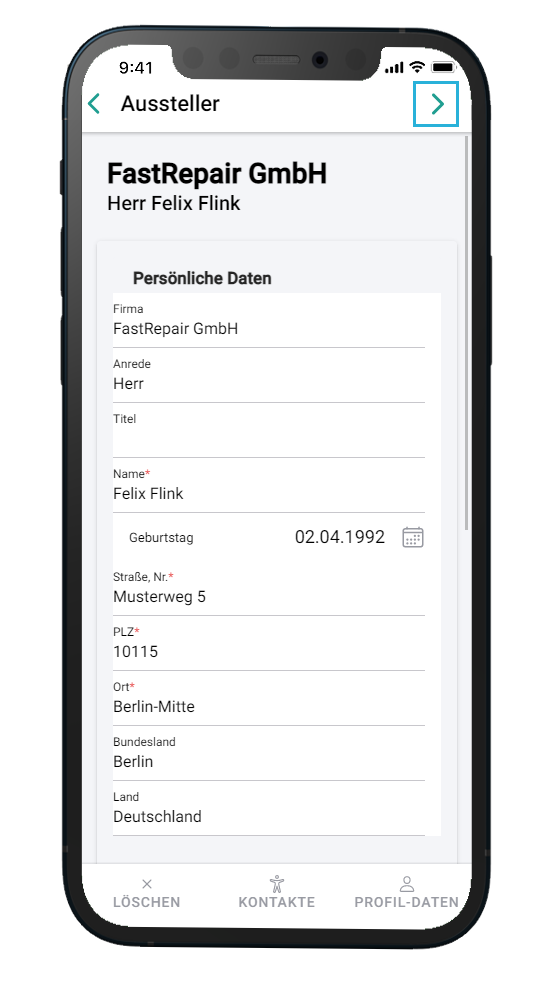
Step 6: Add issuer and recipient data
Next, fill out the exhibitor and recipient pages. On the exhibitor page you usually enter your own information. On the recipient page you will find the customer information.
Too much to type? Automate with master data! If you have products or contacts stored in your master data, you can select them during document creation using the contact or product buttons shown below. Then your document is ready in a few seconds!
Step 7: Finalize the document with your signature
Depending on the document type, a legally binding signature may be required. For example, if you have selected a receipt or a contract, the signature of one or both parties will be requested after the recipient data. Simply sign with your finger or a pen on your mobile device and confirm your entry.
Step 8: Share document
After the document has been created, you can manage it in the app. Swipe the document to the left with your finger. Here you will see a share button. You can use it to send the document to the recipient by email or download it locally as a PDF.
You did it!
Congratulations! You have created your first own document.
And here again the visual process
In the following pictures we show you how to create a receipt.


You can see the result here (click for full screen):

Have fun using Thumbify and good luck creating your documents!
If you still have questions, feel free to contact our customer service for further assistance.